Cauliflower Soup… Simple and Delicious

29 Jul

Cauliflower is one of those vegetables that is frequently over looked. Not only can it be a bit intimidating to cook, it can also stir up memories of bitter, soggy, over cooked nightmares from your childhood. Well my friends, cauliflower is no longer the white villain of yesterday. It’s actually very delicate, sweet and tasty!

One of my favorite ways to prepare cauliflower is to roast it. This is simpler than you might think:

Roasted Cauliflower
1 head cauliflower, cut into 1 inch pieces
2 tablespoons olive oil
salt 
Toss the cauliflower with the oil and salt and roast in a 400 degree oven for 15 minutes. Turn the pieces and then cook for another 5 minutes. Serve as desired.

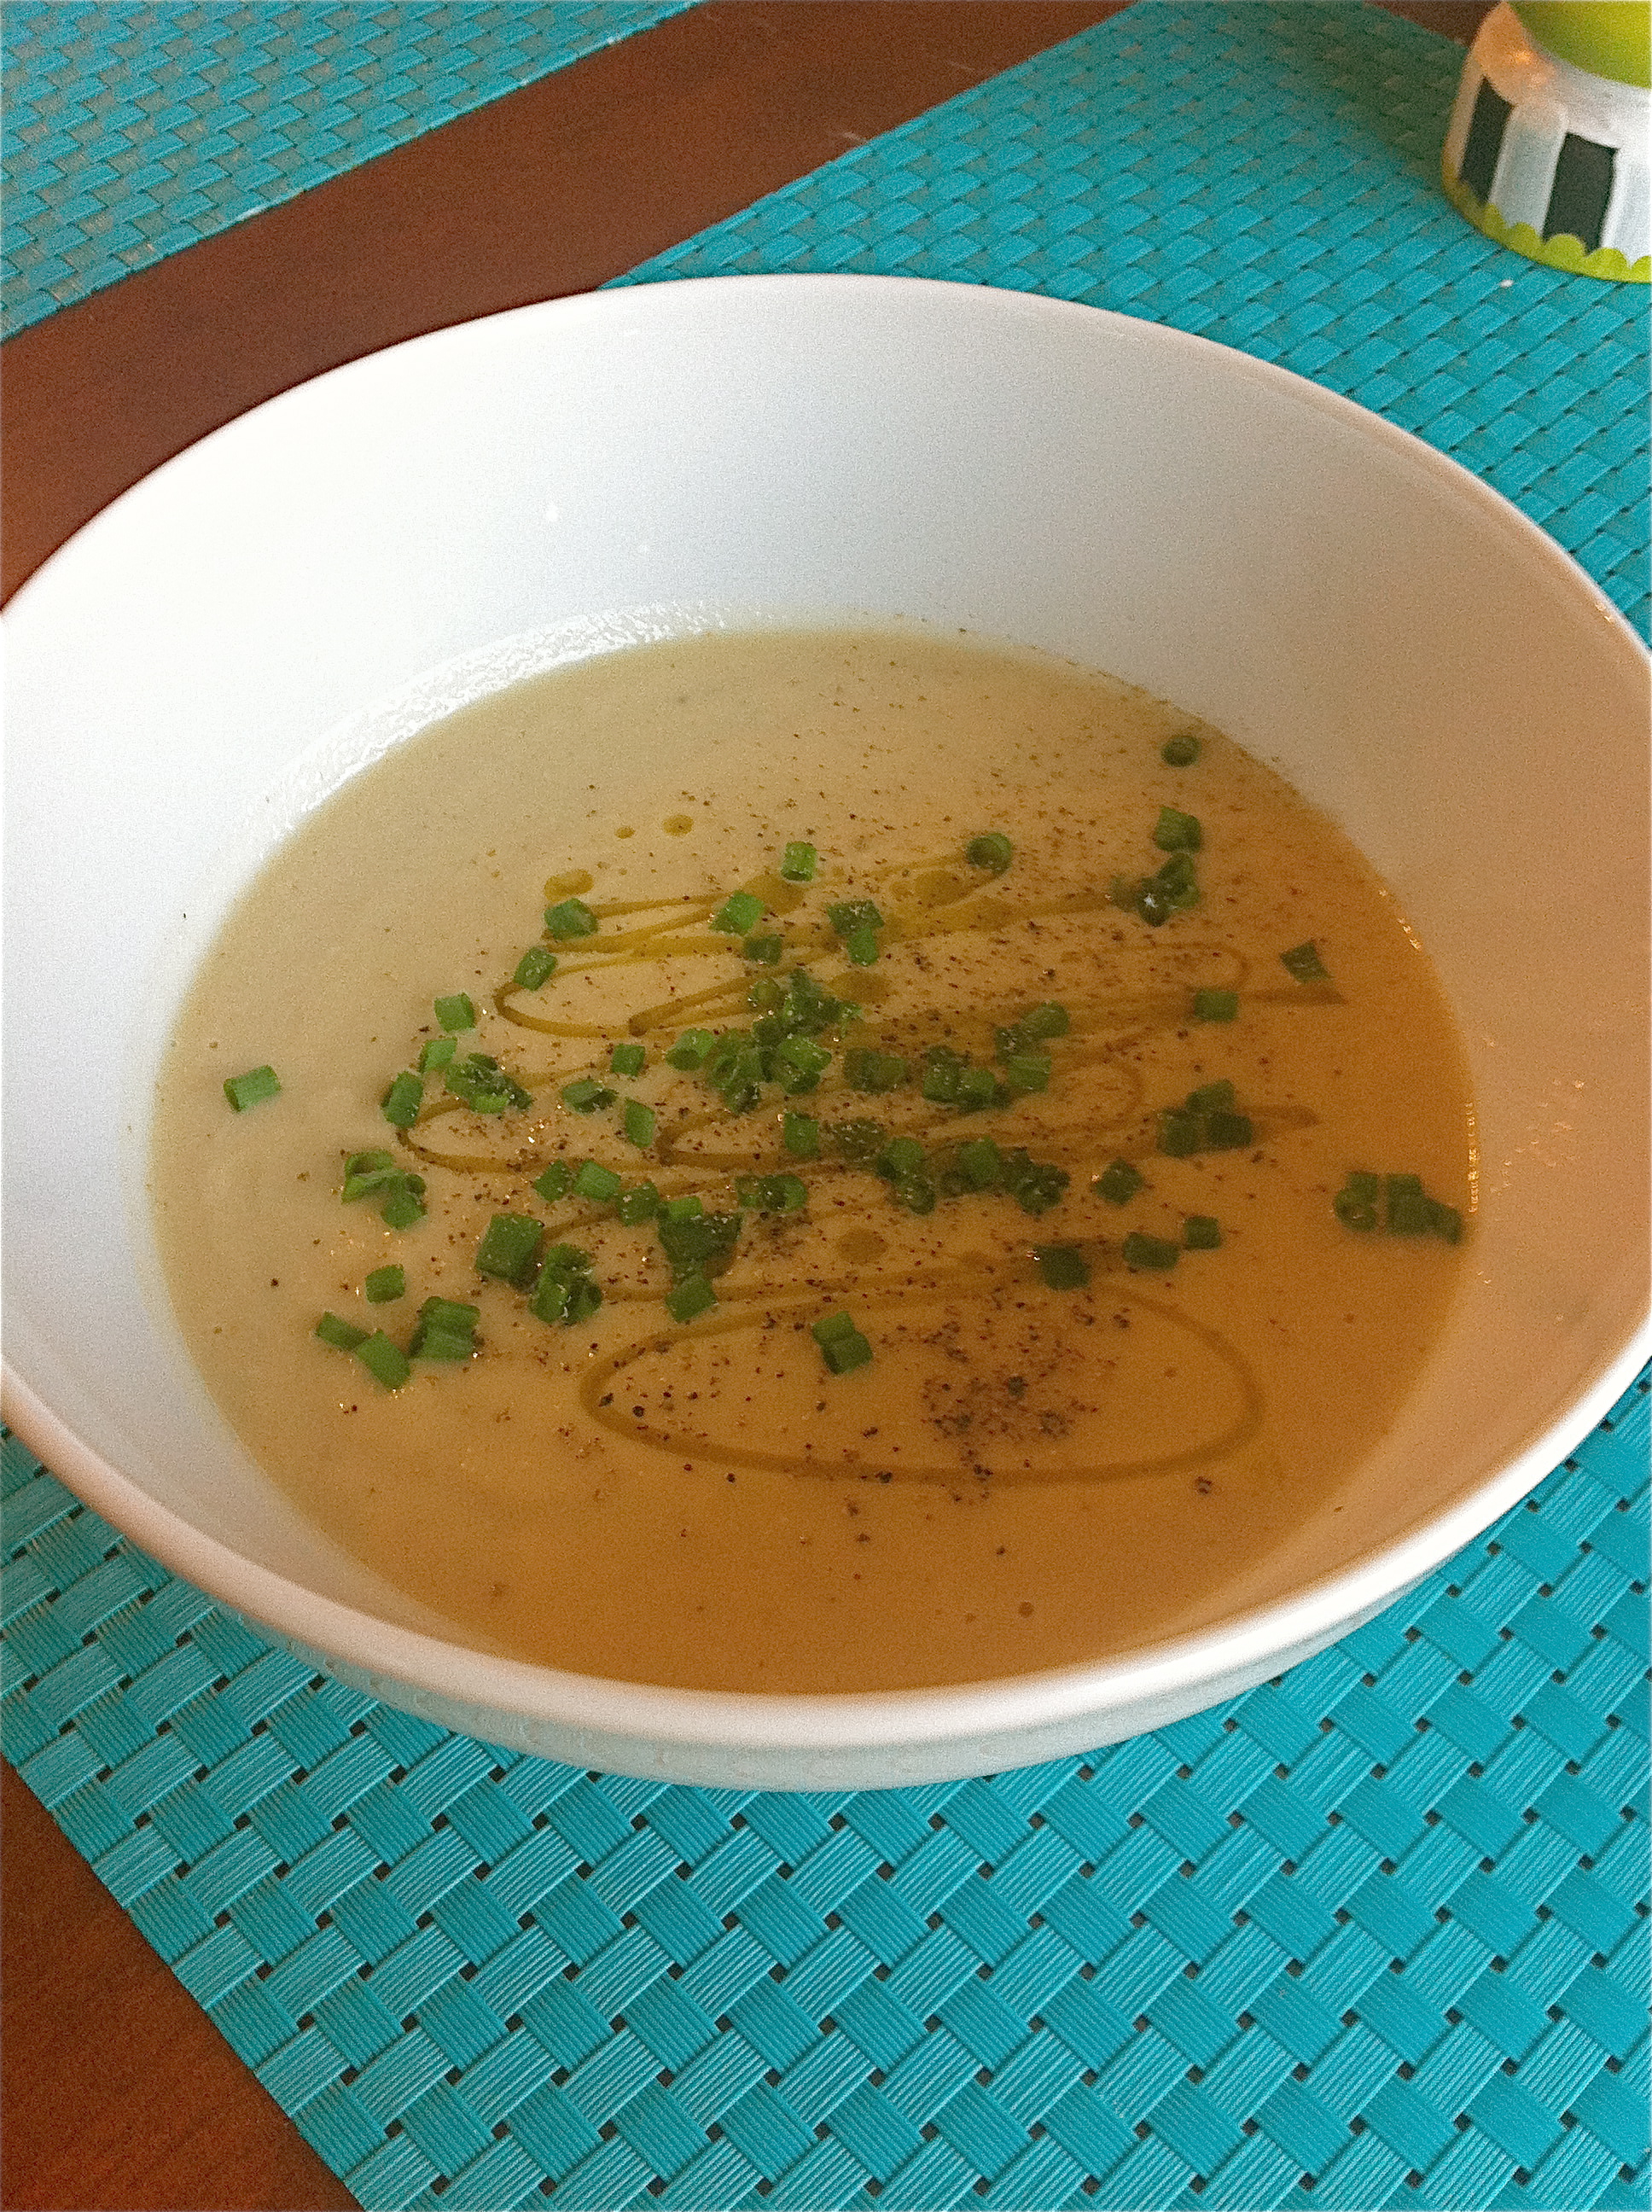
What can you do with this cauliflower once you have have it roasted? Well, eat it for 1 but I like to make soup. The cauliflower creates a delicate flavor that needs minimal enhancements. You can garnish the soup with toasted walnuts, pesto, sour cream, or even plumped raisins, but I like to keep it simple with olive oil, cracked pepper and a few snipped chives. The recipe is below.

Roasted Cauliflower Soup
1 head of cauliflower prepared as directed above
2 cloves of garlic
3-4 cups prepared chicken stock
1/2-1 cup water
salt and pepper to taste

Puree all the ingredients in a Vitamix blender or in a food processor until smooth. Pour the pureed mixture into a saucepan and reheat to desired temperature. Garnish as desired and enjoy.

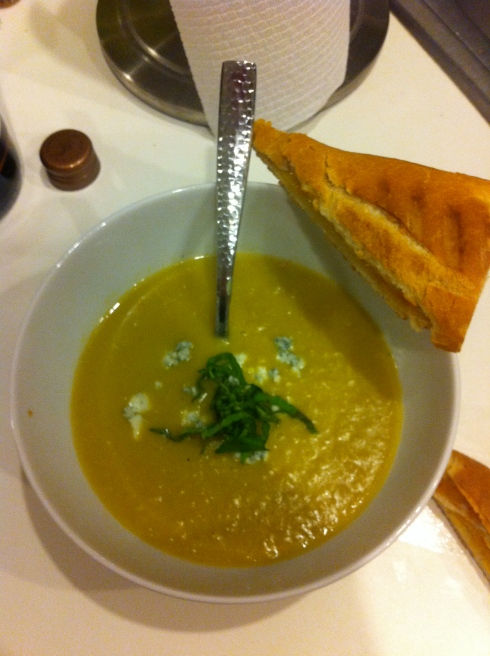
Try this recipe with grilled or smoked cauliflower as well. It will stay on the top of your go to list for awhile. It also freezes well and reheats like a dream. And, if you are feeling hot… try it chilled with a fresh herb garnish and drizzle of really good olive oil. Oh, and a perfectly chilled glass of Sauvignon Blanc 🙂

Always thinking about the next meal

-Katie

Image

Sweet Corn Soup

23 Oct

So the other night Ryan and I went out to dinner at Seasons 52. On a seasonal basis, they have the most amazing corn soup. I have tried on countless attempt to duplicate said soup… but alas no dice. Well, until recently…

Sweet Corn Soup
1 1/2 small bags frozen corn
1 container Campbell’s White wine and herb chicken broth
3/4 cup sweet onion, diced
1 tablespoon olive oil
2 tablespoons corn syrup
2 tablespoons honey
1/8 teaspoon turmeric
1/8 teaspoon cayenne pepper
salt and pepper to taste

In a sauce pot over medium heat saute the onion in the olive oil. Cook the onion for 5-7 minutes or until the onions are transparent. Season with salt and add in corn. Add in turmeric and cayenne pepper. Add in the broth and cook for 15 minutes or until the corn is fully defrosted and softened. Add in the honey and corn syrup and let the soup cook for another 5 minutes. Puree all of the ingredients in a blender or with an immersion blender. This may take a little while. You are looking for the soup to be velvety and smooth. Reheat as necessary. Finish the soup with 1 tablespoon of butter.
Garnish with blue cheese crumbles and chopped basil.

Enjoy this with grilled cheese or fresh bread.

Always thinking of the next meal-
Katie

Image

Corn Soup

23 Oct

Corn Soup

I know the lighting isn’t the best, but the flavor was amazing!

Confit… con? or fit?

2 Jun

Confit: [kohn-FEE, kon-FEE]

This specialty of Gascony, France, is derived from an ancient method of preserving meat (usually goose, duck or pork) whereby it is salted and slowly cooked in its own fat. The cooked meat is then packed into a crock or pot and covered with its cooking fat, which acts as a seal and preservative. Confit  can be refrigerated up to 6 months. Confit d’oie and confit de canard are preserved goose and preserved duck, respectively.

© Copyright Barron’s Educational Services, Inc. 1995 based on THE FOOD LOVER’S COMPANION, 2nd edition, by Sharon Tyler Herbst.

Read More http://www.epicurious.com/tools/fooddictionary/entry?id=2028#ixzz1OA1VZ100

Confit, as defined above is reserved for slowly cooking poultry in their own fats for preservation reasons. But, lately, it seems as though you can “confit” anything. I’ve seen recipes for tomato confit, garlic confit, lemon confit and most recently, chickpea confit. Personally, I feel that confit is turning into one of those culinary terms like carpaccio. You see anything sliced paper thin is a carpaccio of “fill in the blank.” Granted anything salted and slowly cooked in fat sounds delicious to me, but is it really a confit?

It’s an interesting thought really. Why not just poach these items in oil. They certainly done have their own fat to bring to the party. But what’s the different between oil poaching and confit? Mostly, when you poach something in oil, you are removing the item from the cooking liquid whereas with a confit it is being stored in the fat. Still, doesn’t tomato confit sound so much more luxurious than tomato dip or even preserved tomatoes. And an oil poached tomato kinda sounds like a greasy mess.

Confit or not, I made my version of chickpea confit. The bottom line is that this is a dip or spread. It’s similar to hummus but with infinitely more flavor and texture. Plus it sounds so elegant for a dip. Here’s the recipe:Chickpea Confit

Chickpea Confit
1 cup canned chickpeas, drained and rinsed
2 large garlic cloves
1 sprig rosemary
1/2 teaspoon lemon zest
1/2 teaspoon salt
1/4 teaspoon freshly cracked pepper
1/2 cup extra virgin olive oil
1/4 cup canola oil

Combine all ingredients in a small saucepan and cook over low for 45 mins-1 hour. Let the mixture cool slightly and mash with a fork. Serve chilled with fresh baguette or crackers.

So what is my final verdict on the proper nomenclature? Well, I think that whenever something sounds exotic and exciting it makes me want to eat it more. I’m still not convinced that radish carpaccio should be allowed… but the idea of elevating a simple vegetable to new heights by cooking as if it was as special as duck or goose, can only be a good thing.

Always thinking of the next meal

-Katie

Chilled Soup for Dr. Suess

10 Apr

Chilled Tomato and Yellow Pepper SoupAt the end of the month I will be catering a large VIP event for the school that I work for. The PTO holds an annual auction that has an option that allows you early access to the event plus cocktail and appetizers. In the the past this event has been catered by the PTO. Usually a parent steps in and takes on the job. However, this year, they’ve asked for my help.

I’m very excited for the opportunity. You see, I have also donated a dinner party to be auctioned off at the event. Last year, my dinner party sold for $800. And that was without anyone tasting my food. This year, since I’ll be doing the event prior to my dinner party coming to the table for bidding, I’m hoping to raise at least $1000 for the school.

I’ve been given free reign of the menu, with one catch. The theme of the auction is Dr. Suess and so the foods should be colorful and whimsical. On the menu I have things like; green eggs and ham (wasabi deviled eggs with crispy prosciutto), Bratwurst sliders, Black bean and green chili empanadas, a fruit and brie display, cheese ravioli with deconstructed pesto, chilled shrimp with bloody Mary cocktail sauce, and the recipe I tested tonight, chilled tomato and yellow pepper soup.

I always love being at events that pass soup. I’ve had tomato soup served in martini glasses with a pimento cheese garnish, gazpacho, and minted pea soup. There are the fruit soups (a.k.a smoothies) and other chocolaty liquids served in mini bowls or shot glasses. I just think it’s refreshing and unexpected. I knew I wanted to do a colorful soup and I knew I wanted it to be layered. I love chilled tomato soup. It’s light and refreshing and so different than the thick cloying tomato juice that you are probably thinking of. I also love yellow peppers. They are sweet and juicy and taste delicious. Viola! The soup concept was born.

For the Tomato Soup:
2 large beefsteak tomatoes
1/2 garlic clove
1/2 med shallot
1 tablespoon olive oil
salt and pepper to taste

Step 1: Concasse 2 beefsteak tomatoes
Step 2: In a hot saute pan, heat 1/2 a medium shallot and 1/2 garlic clove
Step 3: When the garlic and shallot start to become arromatic, add the tomatoes and cook for 10 minutes
Step 4: Puree in a food processor
Step 5: Season to taste
Step 6: Chill in the refrigerator for at least 1 hour

For the Yellow Pepper Soup:
2 large yellow bell peppers
1/2 garlic clove
1/2 med shallot
1 tablespoon olive oil
salt and pepper to taste

Step 1: Roast the shallot and yellow peppers in the oven for 30 minutes
Step 2: Put the peppers and shallots in a plastic bag and zip shut until the peppers are cool enough to handle
Step 3: Peel the peppers and add everything into the food processor
Step 4: Puree in a food processor
Step 5: Season to taste
Step 6: Chill in the refrigerator for at least 1 hour

Gently layer the tomato soup on top of the pepper soup. I like to serve soup for a crowd in shot glasses. It’s fun and little so your guests don’t feel like they are eating too much before the main meal. I garnished with basil oil and a few leaves. On the night of the event I think I’m going to garnish with chive oil since the basil oil has a tendency to blacken if not properly pureed.

I think this one is a real winner.

Always thinking of the next meal

-Katie

Pickled Beets and Strawberries

3 Apr

Pickled Beets and StrawberriesPickled beets are not just for the salad bar. Come on, you know the ones. Their neon glow reflects so queasily on the sneeze guard. You know, it’s not that pickled beets taste bad, really I think they taste good… it’s just… they are so intimidating.

I know beets are good for you and they are a natural source of sugar, and even though I make beets quite often, I am always intimidated by the pickled version. I guess I’m always thinking that they are going to taste like an odd combination of dill pickles and roasted beets. So the other day I was at Whole Foods and I saw a jar of pickled beets and strawberries. Sounds good…definitely no weird dill garlic beets combo in there. Problem… 8 bucks. I passed…on the jar, not the idea.

I came home and started playing. What I discovered was a crazy amazing combination of flavors!

Pickled Beets and Strawberries

Step one: Roast 2 large beets

2 large beets
1 tablespoon olive oil
sprinkle of salt

roast at 400, wrapped in foil for 1 hour.

Step two: prep the strawberries and peel beets

Slice 1 pint of strawberries
Let the beets cool to room temperature and then peel the skin off the beets and then slice the beets

Step three: prepare to pickle

in a small bowl combine the sliced strawberries and beets with the juice and zest of 1 blood orange and 1/2 cup apple cider vinegar.
Put the whole mixture in a air-tight container and let sit for 3 days.

Serve with crackers and goat cheese or just eat out of the jar… they are that good!

Always thinking of the next meal

-Katie

You don’t have to hug a tree to love granola

31 Mar


I love granola. I mean what’s not to like about sweet crunchy whole grains mixed with fruit and nuts. I make granola a lot at work. I serve it to the kids to mix with yogurt and fruit. It holds up well without going stale and it can be flavored in so many ways. Since today is a very rainy day I figured it was a good day to play with the food in the house.

If your pantry is anything like mine, you have a few items in there that are partially used. I always seem to have a 1/4 cup of chocolate chips or a handful of nuts. I also seem to have an assortment of dried fruits left over from different recipes. Granola is great what to use up all those odds and ends. As with most things, granola is a technique. Once you’ve mastered the basics, you can tweak the ingredients to customize your mix.

Here’s the basic formula for granola:

2 cups old fashioned oats
1/4 cup maple syrup
2 tablespoons brown sugar
pinch of cinnamon
pinch of salt

Preheat your oven to 350. Combine all ingredients in a large bowl and toss until the mixture is crumbly and the syrup has been evenly incorporated. Spread on a cookie sheet and bake for 15-20 minutes. Be sure to stir the mixture every 5 minutes to prevent burning.

Below is a table of combinations to give you an idea of how you can mix and match flavors to make a personalized granola…

Basic Base Dry Goods Syrup Flavor 2nd Flavor Additives
oats no additional maple cinnamon brown sugar dried fruit
oats wheat germ agave pumpkin

pie spice

vanilla powder pecans
oats coconut honey cinnamon brown sugar dried fruit
oats shredded wheat honey nutmeg clove white chocolate chips
oats puffed rice agave espresso powder vanilla powder chocolate chips

Today I made a tropical granola… here’s the recipe:

2 cups oats
1/4 cup honey
2 tablespoons brown sugar
pinch of cinnamon
3/4 cup shredded coconut

Added after the base was toasted and cooled:
1/2 cup dried mango, torn into small pieces
1/2 cup banana chips
1/4 cup chocolate chips
1/2 cup honey roasted peanuts

I followed the above technique and viola, a yummy granola! I would also recommend using macadamia nuts instead of the peanuts or omitting the chocolate chips for a slightly healthier granola, but ce la vie… This is what you get what you’re cleaning out the pantry

Always thinking of the next meal

-Katie

Lemon Chicken on the Grill

7 Mar

I love chicken. Seriously, I think I might have to join an “anonymous” group to get over this. I know there are a few chicken nay-sayers out there. They think chicken is boring and dry… why eat chicken when there’s juicy medium rare beef and fantastically fatty pork parts. To be honest, I have never ordered chicken at a restaurant. Well, maybe a chicken sandwich, but otherwise I keep to my own chicken. And not that I like to toot my own horn, but I make a damn good chicken.

Tonight I made grilled lemon chicken. Just as with roasting, when you grill the chicken whole, you get all the extra flavor of the skin and bones and drippings. In hind sight I should have taken pictures to demonstrate how to remove the backbone and keel bone of the chicken before you grill the chicken. I guess that means that I’ll have to do another post detailing it. Until then you can check out this page

The recipe is simple. Flatten the chicken and then drizzle with olive oil. Season with salt and pepper and then toss on a hot grill skin down. I sliced 2 lemons in half and thew them on the grill as well. Let the chicken cook for 5-7 minutes and then turn it 45 degrees. Allow the chicken to cook for another 10 minutes and the flip. Squeeze the lemons on the chicken and close the grill. Turn the heat to medium let the chicken cook for about 25 minutes or until the chicken is cooked to about 155 degrees. Then wrap the chicken in foil and let it rest for 10 minutes. Slice the chicken and re-season with lemon juice, salt and pepper. Serve hot.

This recipe works with thighs, breasts, whole chicken and wings 🙂

Always thinking of the next meal

-Katie

Strawberry and Rhubarb Galette

6 Mar

Nothing says spring to me like strawberries and rhubarb. And, now that I’m living in Florida, I have the pleasure of getting local strawberries. I’m sure I’ve bored you all before with my rants on fresh local ingredients, but the simple truth is… the shorter the distance between you and your food, the better.

I was in the grocery store this afternoon and the sale was 3 pounds of local strawberries for $5. I wasn’t really shopping for fruit. In fact, I was there getting a toothbrush, but I couldn’t resist this deal. The rhubarb was cleaned and broken down and conveniently merchandised right next to the strawberries. It was kismet. Dessert was a must for tonight.

I love making galettes. They are rustic free form pies that are less stuffy and finicky than traditional pies. The technique is simple enough. Just make a simple pie dough and roll it out on a cookie sheet. Place your fruit in the center of the rolled out dough and then fold the edges in toward the center. Brush the outside with egg wash and sprinkle with sugar. In this case I used pearl sugar. (The pearl sugar doesn’t melt so it gives the effect of salt on a soft pretzel.)

Here’s the full recipe. Make this soon, as rhubarb season is short and the frozen stuff just isn’t the same.

Strawberry Rhubarb Galette

For filling:1 pound strawberries, hulled
1/2 pound rhubard, cleaned and cut into 1/2 inch pieces
1/4 cup sugar

For crust:
1 1/2 cup AP flour
6 T butter, chilled and cut into small pieces
1 T sugar
1/2 t salt
1/2 t vanilla
1 egg
2 T water

Start by making the crust. Combine the dry ingredients together and then cut the butter into the dry ingredients with your fingers until the mixture resembles cornmeal. In a separate bowl combine the wet ingredients. Add the the wet to the dry and kneed to combine. Once everything is incorporated, chill the dough for approx. 30 minutes. While the dough is chilling, make the filling. Combine the fruit with the sugar and allow to macerate.

Preheat the oven to 375 degree. When the dough is chilled, roll it out into a 14-16 inch circle. place all of the filling in the center of the dough leaving a 3 inch border around the sides. Then fold the edges in toward the center leaving a 2 inch hole. Brush the dough with egg wash and sprinkle with sugar. Bake for 35-45 minutes or until the dough is GBD (golden brown and delicious.) Serve at room temp with either vanilla ice cream or whipped cream.

Always thinking of the next meal

-Katie

Sweet and Spicy… just like me

8 Feb

Look and the color of these wings! There is no photoshop folks, that is the true color of my feisty chicken wings. As you know it was the super bowl this past weekend. We were planning on getting together with some friends, but it turned out to be a quiet night in. For me, a football game just isn’t the same without wings. Don’t get me wrong, I love traditional wing sauce, but since it was just the hubs and me, I wanted to play with flavor…

I started with Martha’s Stewart’s recipe for sweet and spicy chicken wings and made some changes to make it my own.

Feisty Wings
1/4 cup mesquite BBQ sauce
2 tablespoons finely grated orange zest
1/4 to 1/2 cup Sriracha hot-chile sauce, or other hot sauce
1/4 cup honey
1 teaspoon toasted-sesame oil
1/4 cup freshly squeezed orange juice
salt to taste
2 pounds chicken wings not separated, patted dry with paper towels

  • Arrange the wings in a single layer on a foil lined cookie sheet. Turn your broiler to high and place the cookie sheet in the middle of the oven. Let the wings cook for 10 minutes before flipping them. You may need to flip the wings a couple of times to avoid burning. While the chicken is cooking, combine the remaining ingredients in a large bowl. When the chicken is cooked through, approximately 20 minutes, take them out of the oven and put them directly in the sauce. Toss to coat and serve.

  • You can deep fry the wings instead of broiling, but the cook time will vary.

  • Try these at you next party… they are delicious!
  • Always thinking of the next meal
  • -Katie